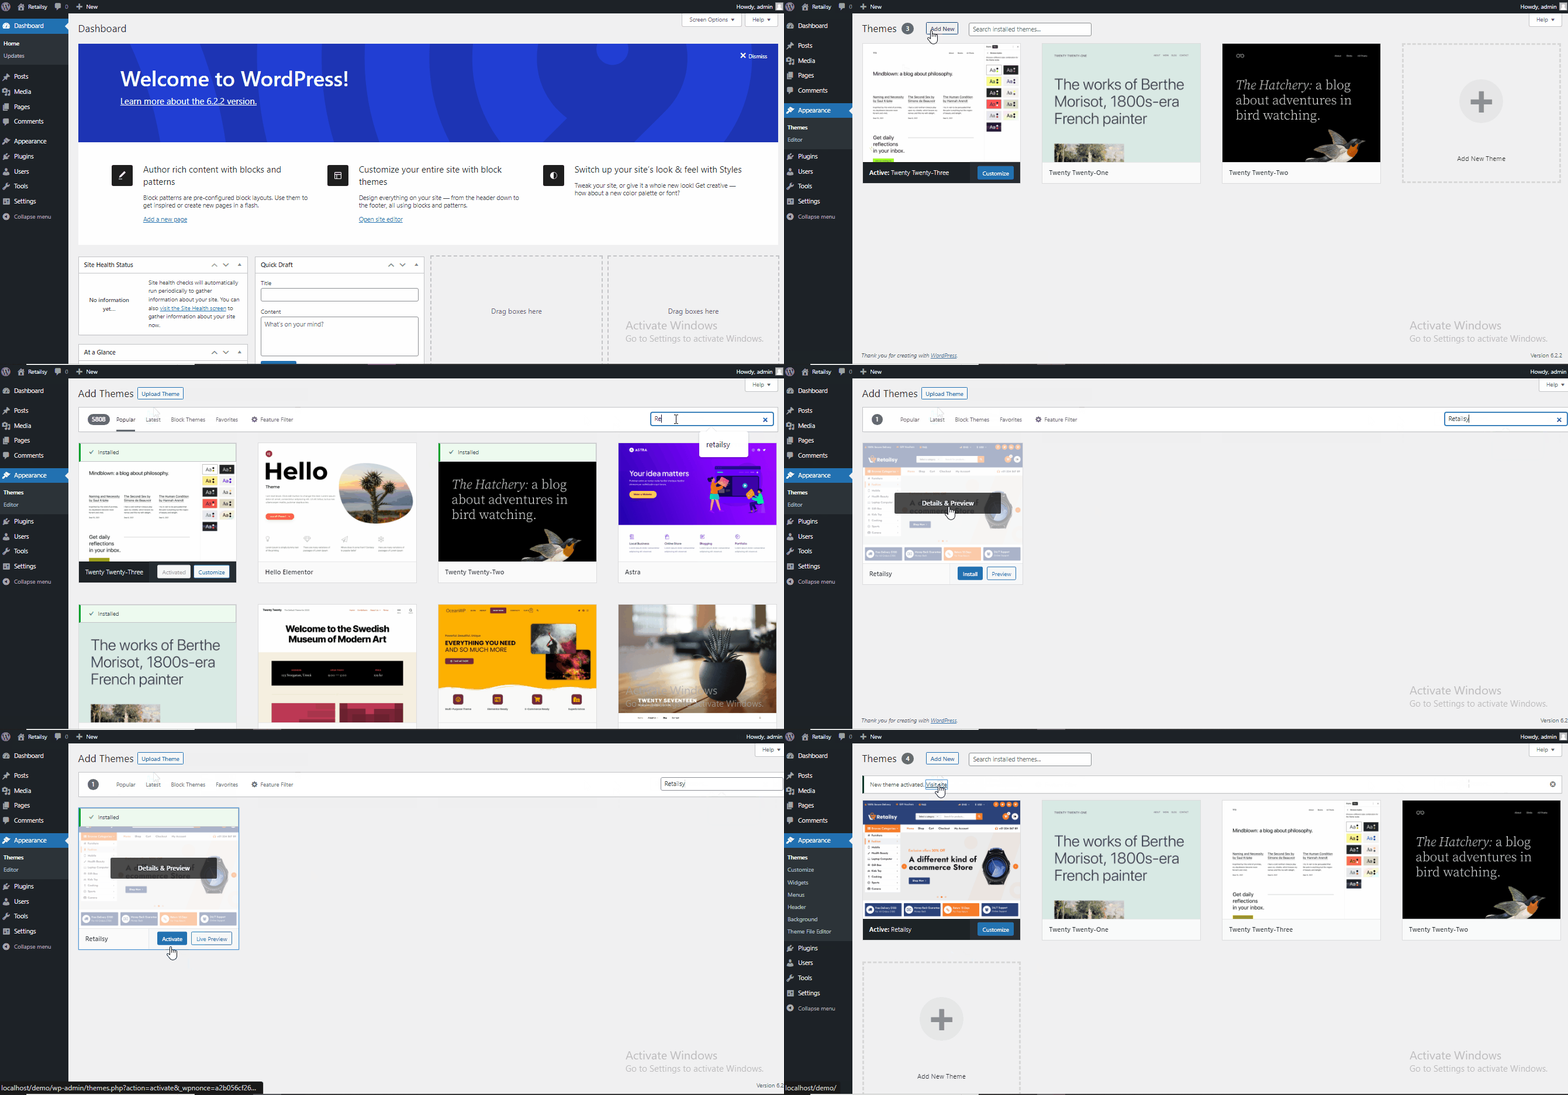
To install the Retailsy WordPress theme via the admin dashboard from the official WordPress.org repository, follow these steps:
1. Log in to your WordPress admin dashboard.
2. Navigate to “Appearance” on the left-hand side menu.
3. Click on “Themes” to access the themes page.
4. On the themes page, click on the “Add New” button at the top of the page.
5. In the search bar on the next screen, type “Retailsy” and press Enter.
6. Look for the Retailsy theme in the search results.
7. Once you find the Retailsy theme, hover over it and click on the “Install” button.
8. WordPress will download and install the Retailsy theme for you.
9. After the installation is complete, click on the “Activate” button to activate the Retailsy theme and make it live on your website.
Congratulations! You have successfully installed and activated the Retailsy WordPress theme via the admin dashboard from the WordPress.org repository. Now you can customize the theme settings, configure its options, and start building your website using the Retailsy theme.
Install Retailsy WordPress theme download file
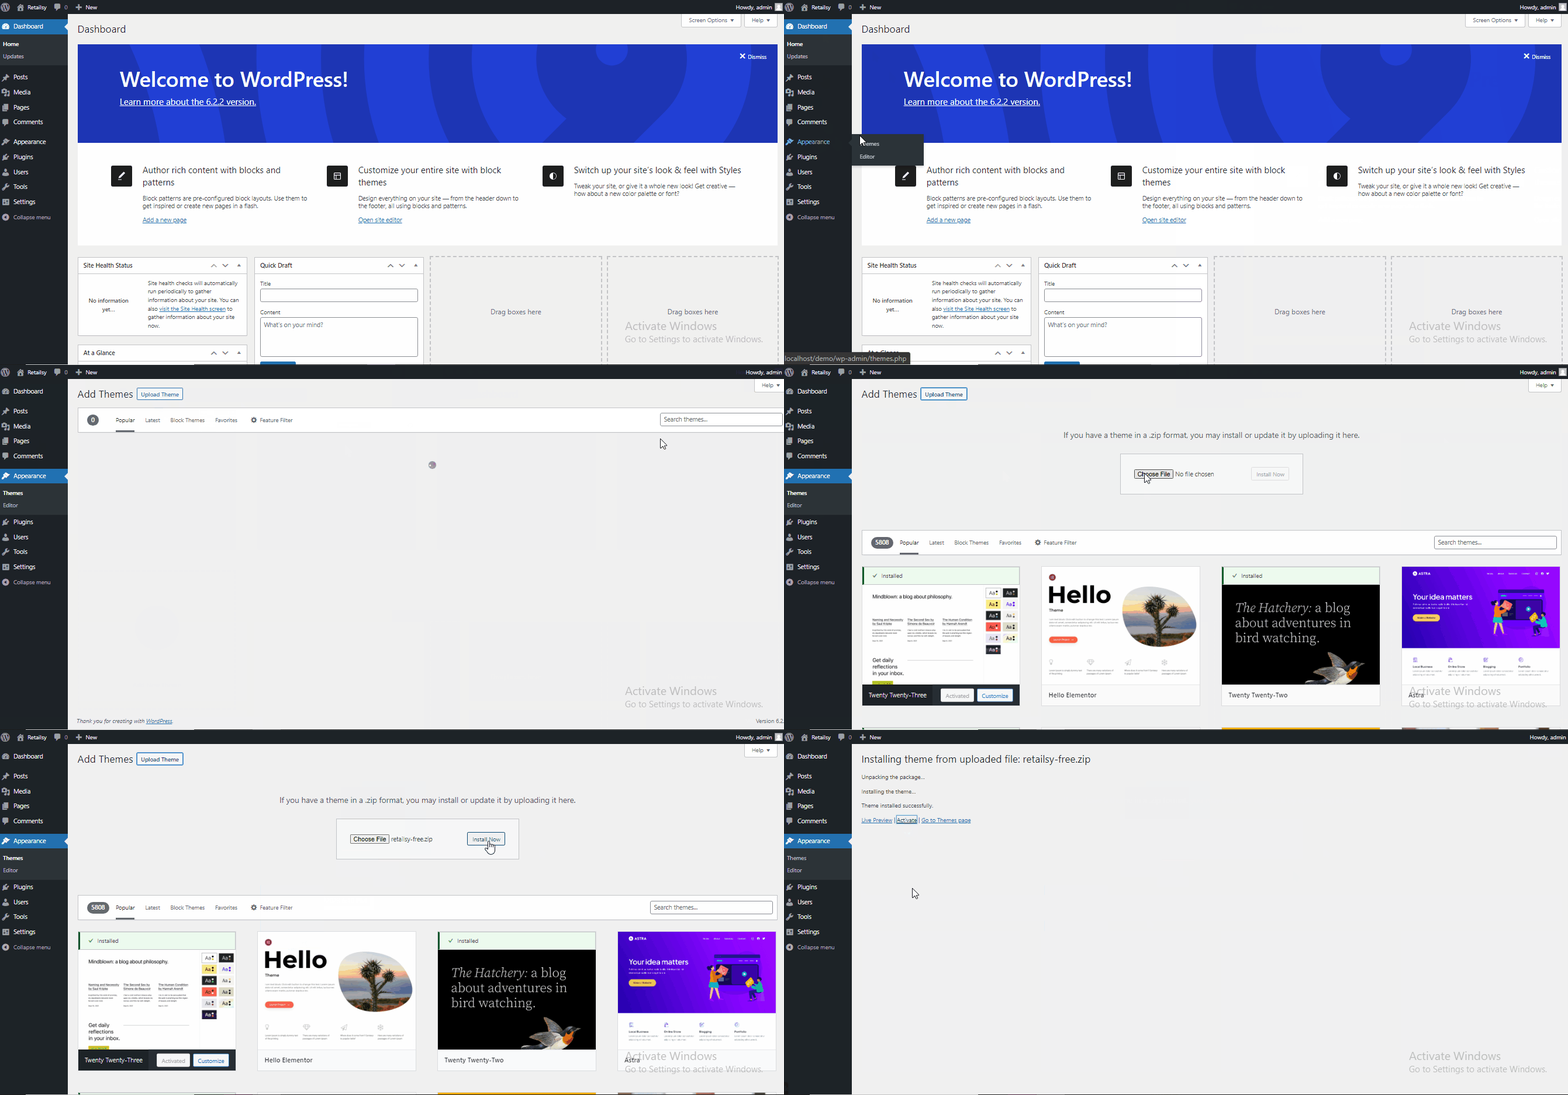
To install the Retailsy WordPress theme in ZIP format through the admin dashboard, follow these steps:
1. Log in to your WordPress admin dashboard.
2. Navigate to “Appearance” on the left-hand side menu.
3. Click on “Themes” to access the themes page.
4. On the themes page, click on the “Add New” button at the top of the page.
5. On the next screen, click on the “Upload Theme” button.
6. You’ll see an option to choose a theme file. Click on the “Choose File” button.
7. Locate the ZIP file of the Retailsy WordPress theme on your computer and select it.
8. Click on the “Install Now” button to begin the theme installation process.
9. WordPress will upload and install the Retailsy theme from the ZIP file.
10. Once the installation is complete, you will see a success message. Click on the “Activate” button to activate the Retailsy theme and make it live on your website.
Congratulations! You have successfully installed and activated the Retailsy WordPress theme in ZIP format through the admin dashboard. Now you can proceed to customize the theme settings, configure its options, and start building your website using the installed Retailsy theme.
To install the Retailsy WordPress theme via WP-CLI (WordPress Command Line Interface), follow these steps:
1. Connect to your server using SSH or access the command line interface.
2. Navigate to the root directory of your WordPress installation.
3. Run the following command to install the Retailsy theme:
wp theme install retailsy
This command will download and install the Retailsy theme from the official WordPress.org repository.
4. Once the installation is complete, run the following command to activate the Retailsy theme:
wp theme activate retailsy
Congratulations! You have successfully installed and activated the Retailsy WordPress theme via WP-CLI. You can now proceed to customize the theme settings, configure its options, and start building your website using the Retailsy theme.
To install the Retailsy WordPress theme via FTP (File Transfer Protocol), follow these steps:
1. Obtain the Retailsy theme ZIP file from a trusted source or purchase it from the theme developer.
2. Extract the ZIP file on your computer to obtain the theme folder.
3. Connect to your web server using an FTP client (e.g., FileZilla, Cyberduck, or WinSCP).
4. Enter your FTP credentials (host, username, password, and port) to establish a connection with your server.
5. Once connected, navigate to the directory where your WordPress website is installed. This is typically the “public_html” or “www” directory.
6. Inside the WordPress installation directory, go to the “wp-content” folder.
7. Inside the “wp-content” folder, locate the “themes” folder.
8. Upload the entire extracted Retailsy theme folder from your computer to the “themes” folder on the server.
Note: Make sure to preserve the folder structure, so the Retailsy theme files are placed in a folder named “retailsy” inside the “themes” folder.
9. Once the upload is complete, log in to your WordPress admin dashboard.
10. Navigate to “Appearance” -> “Themes” on the left-hand side menu.
11. You should see the Retailsy theme listed among the available themes. Click on the “Activate” button below the Retailsy theme to activate it.
Congratulations! You have successfully installed the Retailsy WordPress theme via FTP. You can now customize the theme settings, configure its options, and start building your website using the Retailsy theme.


